When you’re planning a task or project, there are many parameters that define your preferences for scheduling. It would be overwhelming if you had to set each and every one of these parameters (properties) for each task you wanted to plan. That’s why most of these properties use either default values or inherited values. In other words, if you have set up your defaults and created your Outline in the right way, you will not have to change the default or inherited values of these properties most of the time. The following describes how you can change these properties when you need to.
Assigning A Single Time Map to the Task
The easiest way to assign a single Time Map to a line (task) is to use the “/” character in the line title and lookup the Time Map you wish to add to the line. This will replace any existing Time Map for the line.
You can also assign a Time Map, using the line detail. This is only possible when your line is planned. When your line is planned, you will see the Time Map chip above the plan chip as shown below.
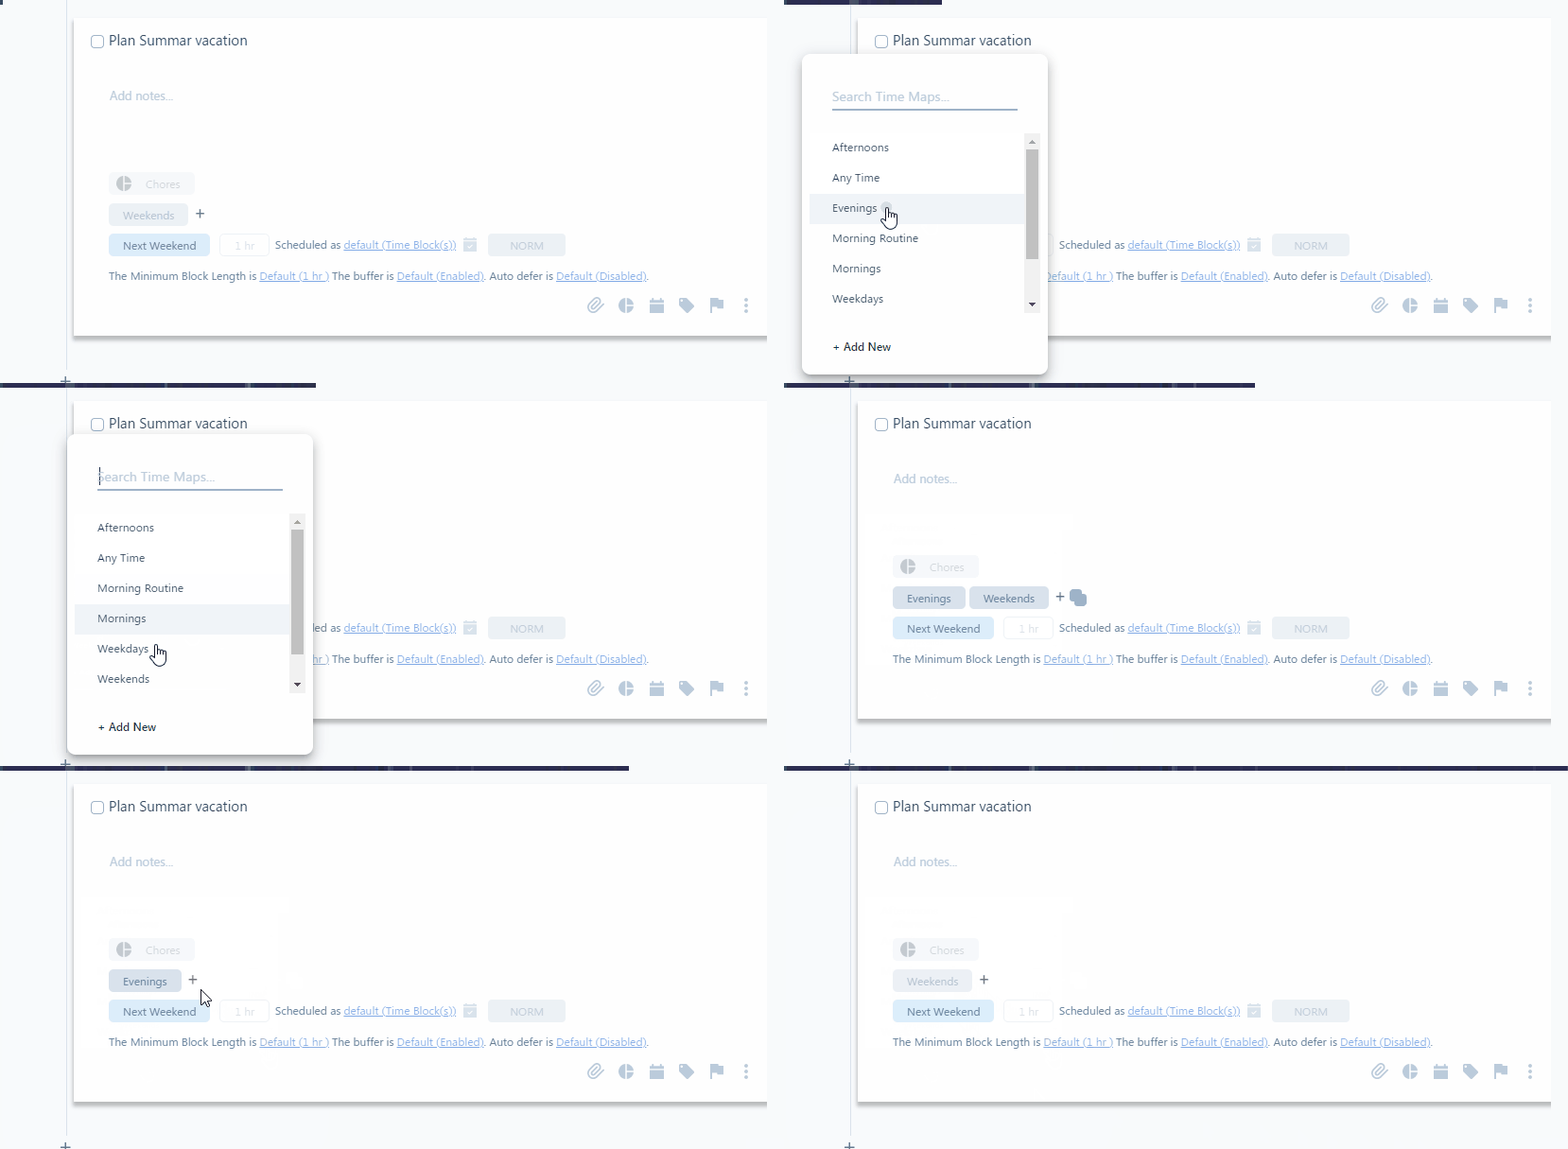
To replace the Time Map: Click on the chip and you will get a list of other Time Maps to choose from.
To use the default or inherited Time Map: Hover the mouse over the chip. If you see an ‘x’, you’ll be able to click on ‘x’. This will replace the Time Map with the default or inherited Time Map.
To add additional Time Map(s): Click on the + sign next to the Time Map chip. Note that once your line has more than one Time Map, you’ll get an additional option for how to combine Time Maps.
Assigning Multiple Time Maps to a Task
To assign more than one Time Map to a line, you will need to open the line detail. The line must also be planned. If you would like to set multiple Time Maps for a line that is not planned, you can temporarily plan it (e.g. Flexible), and then after setting Time Maps, remove the plan.
Notice that when you set multiple Time Maps, you’ll get an additional option for how to combine Time Maps.
Setting the Task Priority
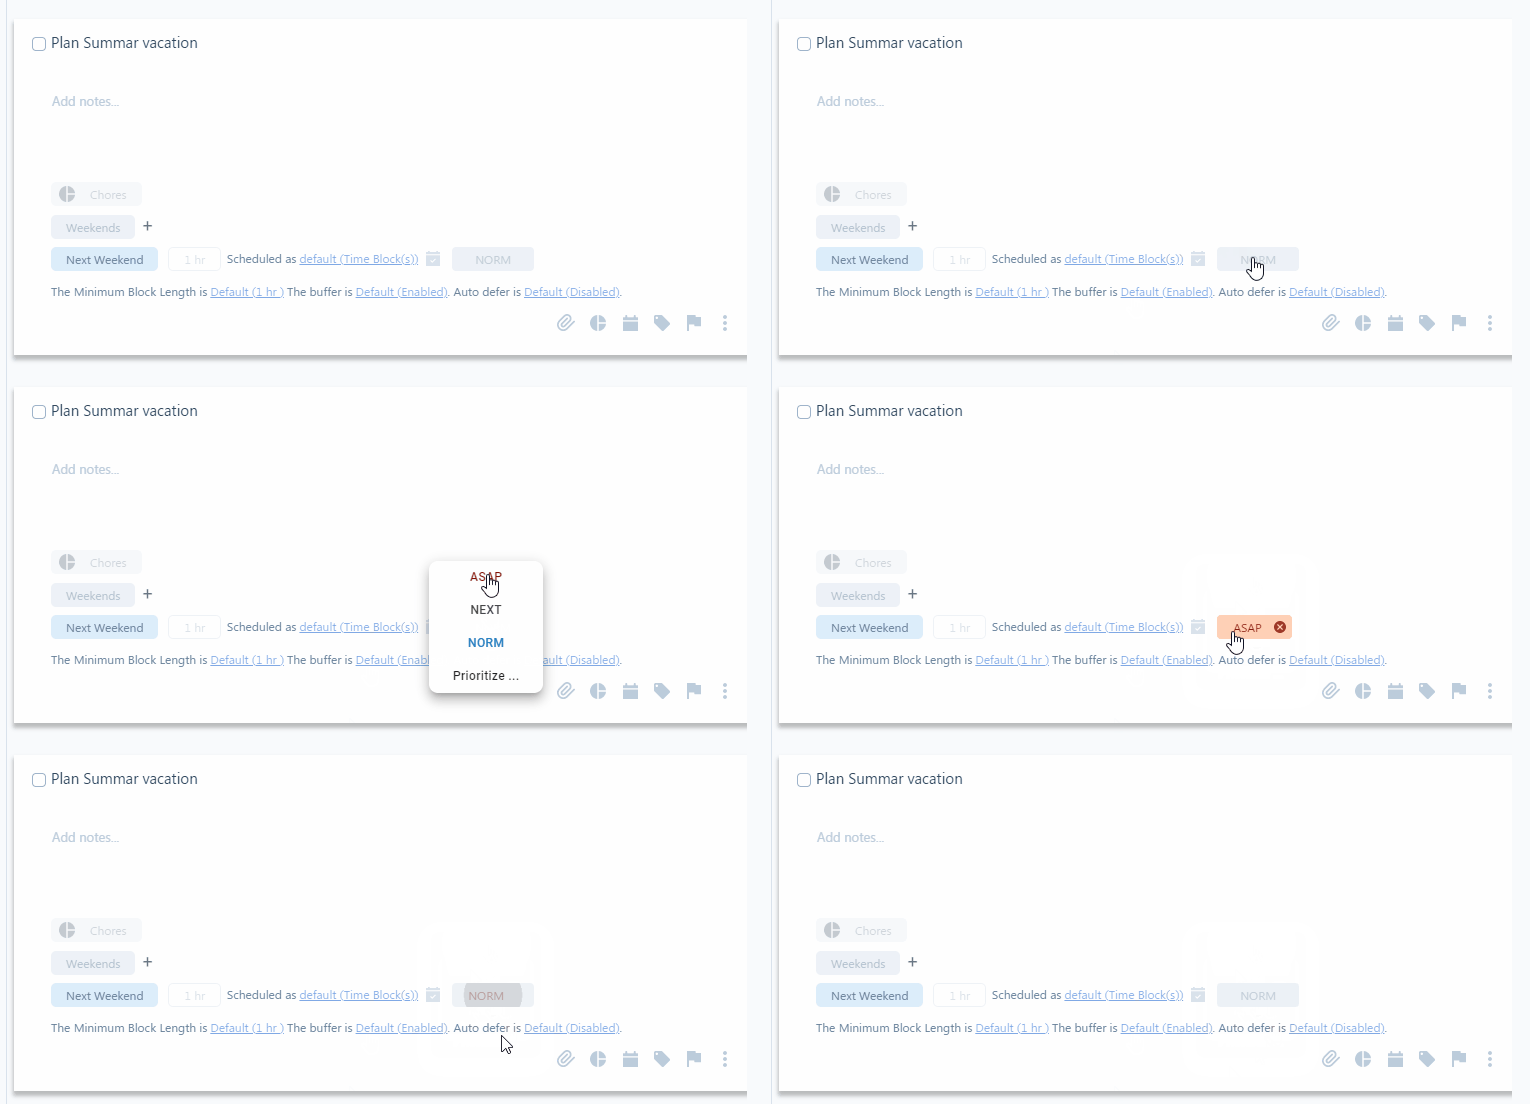
The best tool to prioritize your tasks is the board. But, if you want to immediately set a priority for a new or existing task, you can do so as explained here.
The task priority shows in the line detail next to the plan:
Time Blocking
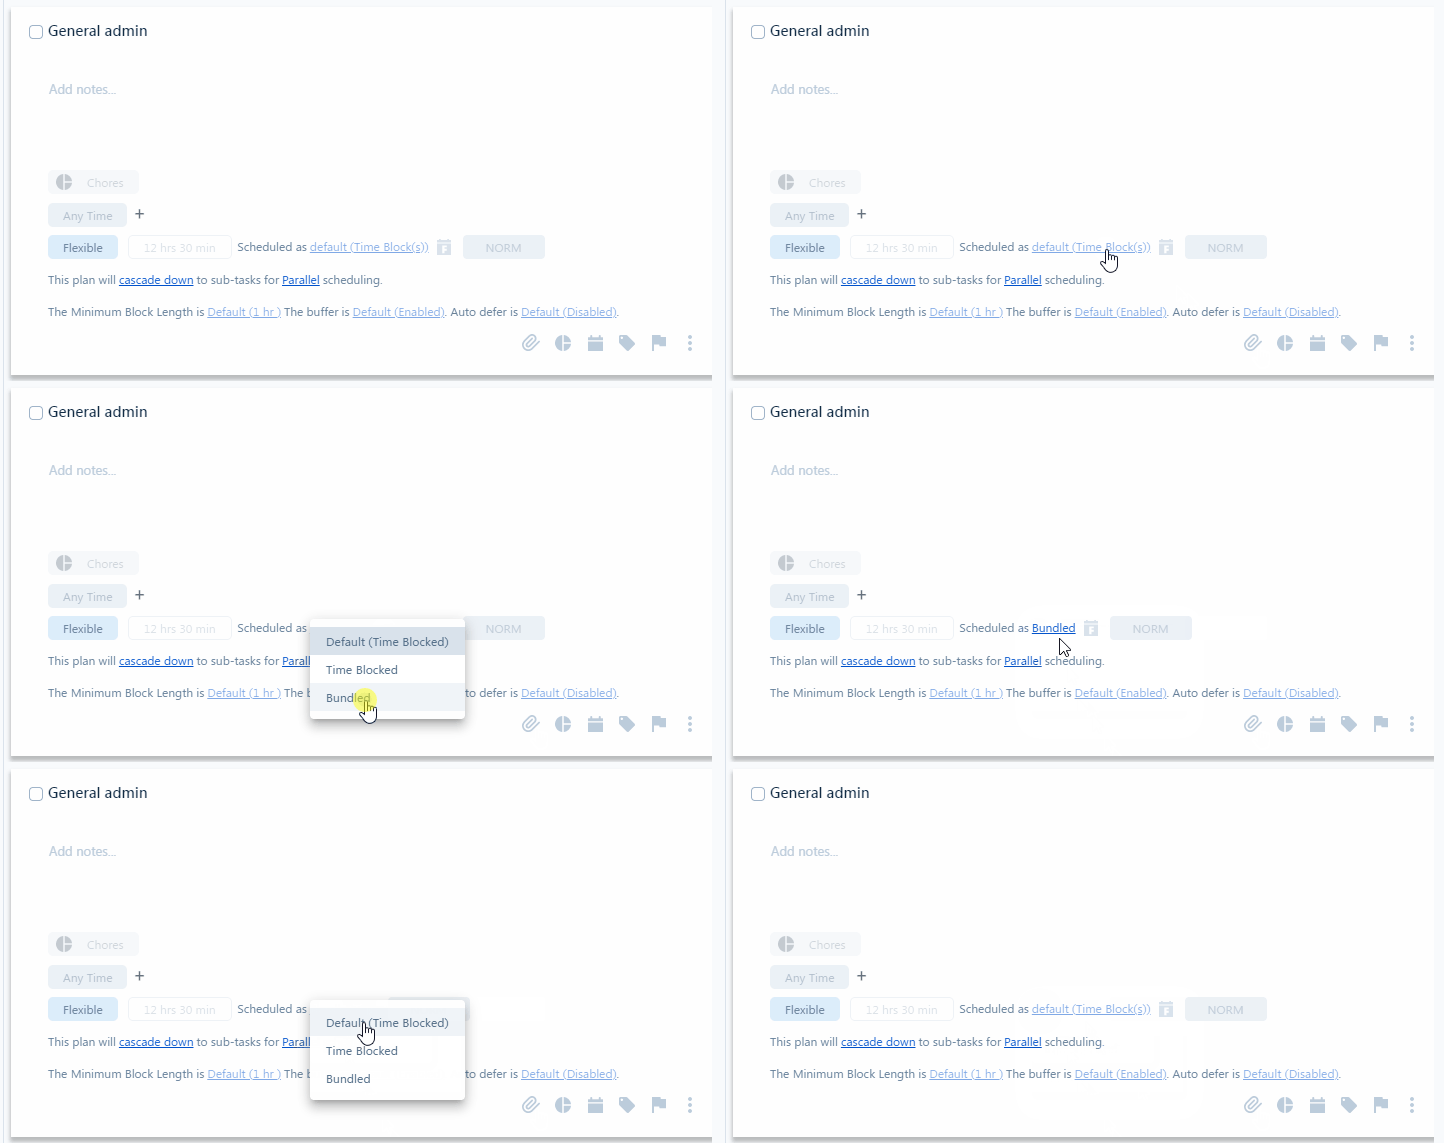
Another default (or inherited) property for each planned line is whether you want this line to get scheduled a Time Block or bundled with other tasks. The hyperlinked text for this property appears next to the plan as shown below:
The Minimum Block Length (MBL)
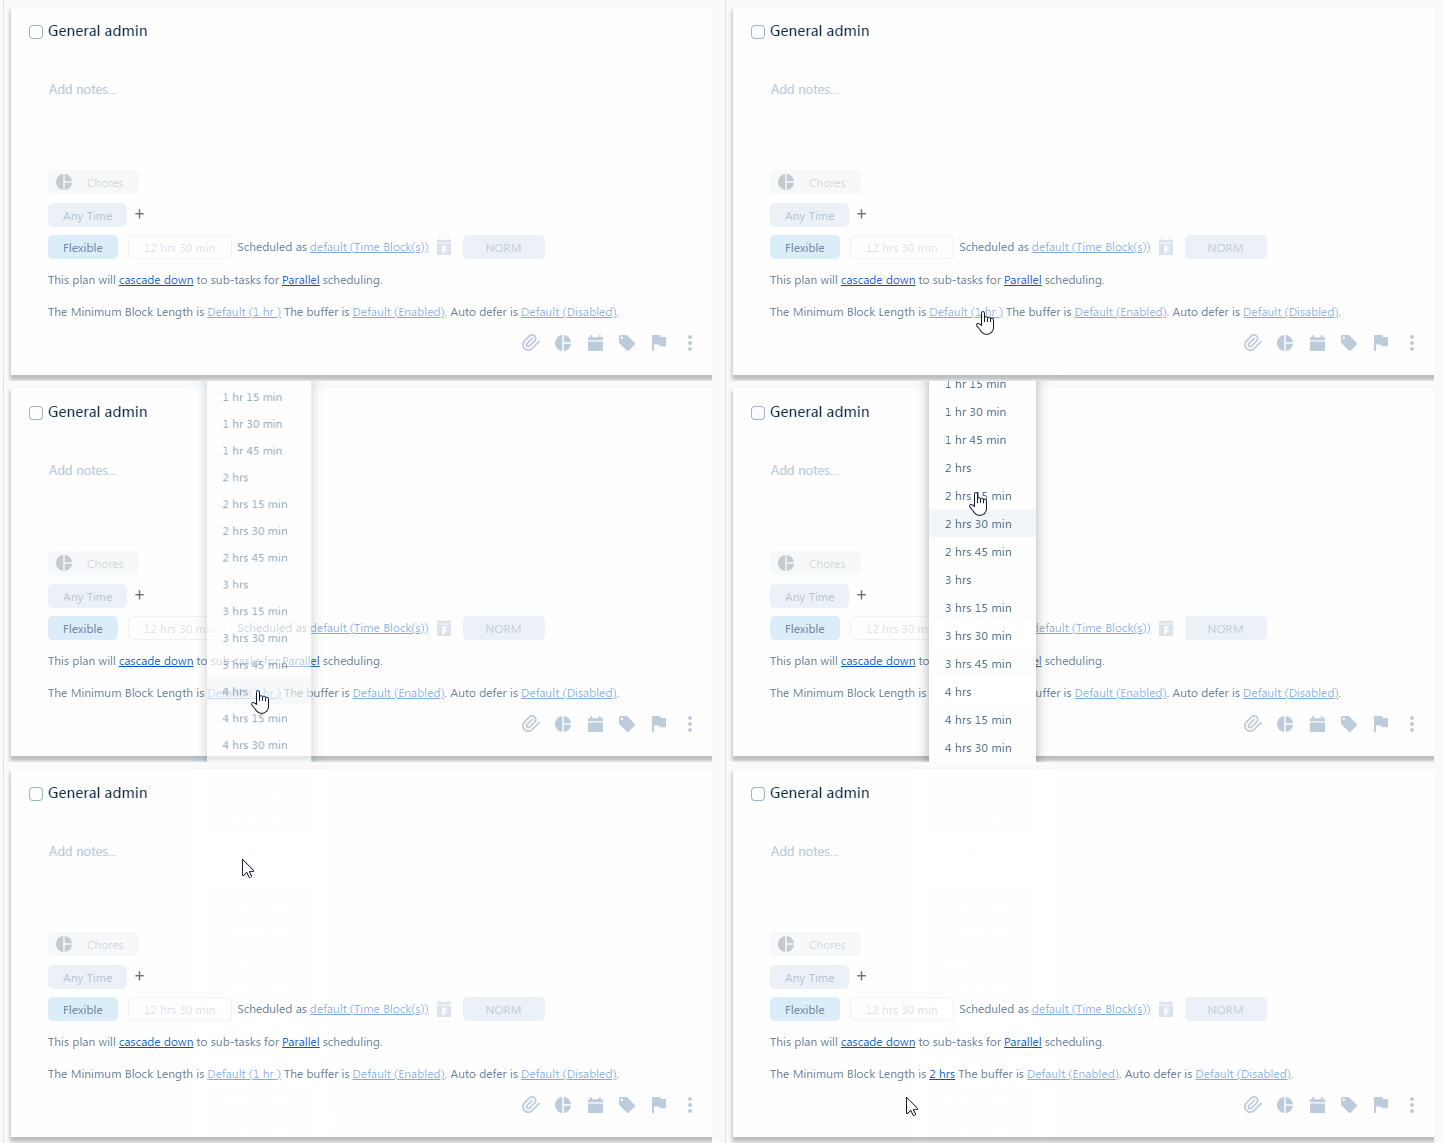
This is another default (or inherited) property for each planned line. This property is explained in detail here. To overwrite the default (or inherited) value, open the line detail and click on the hyperlinked text for this property as shown below:
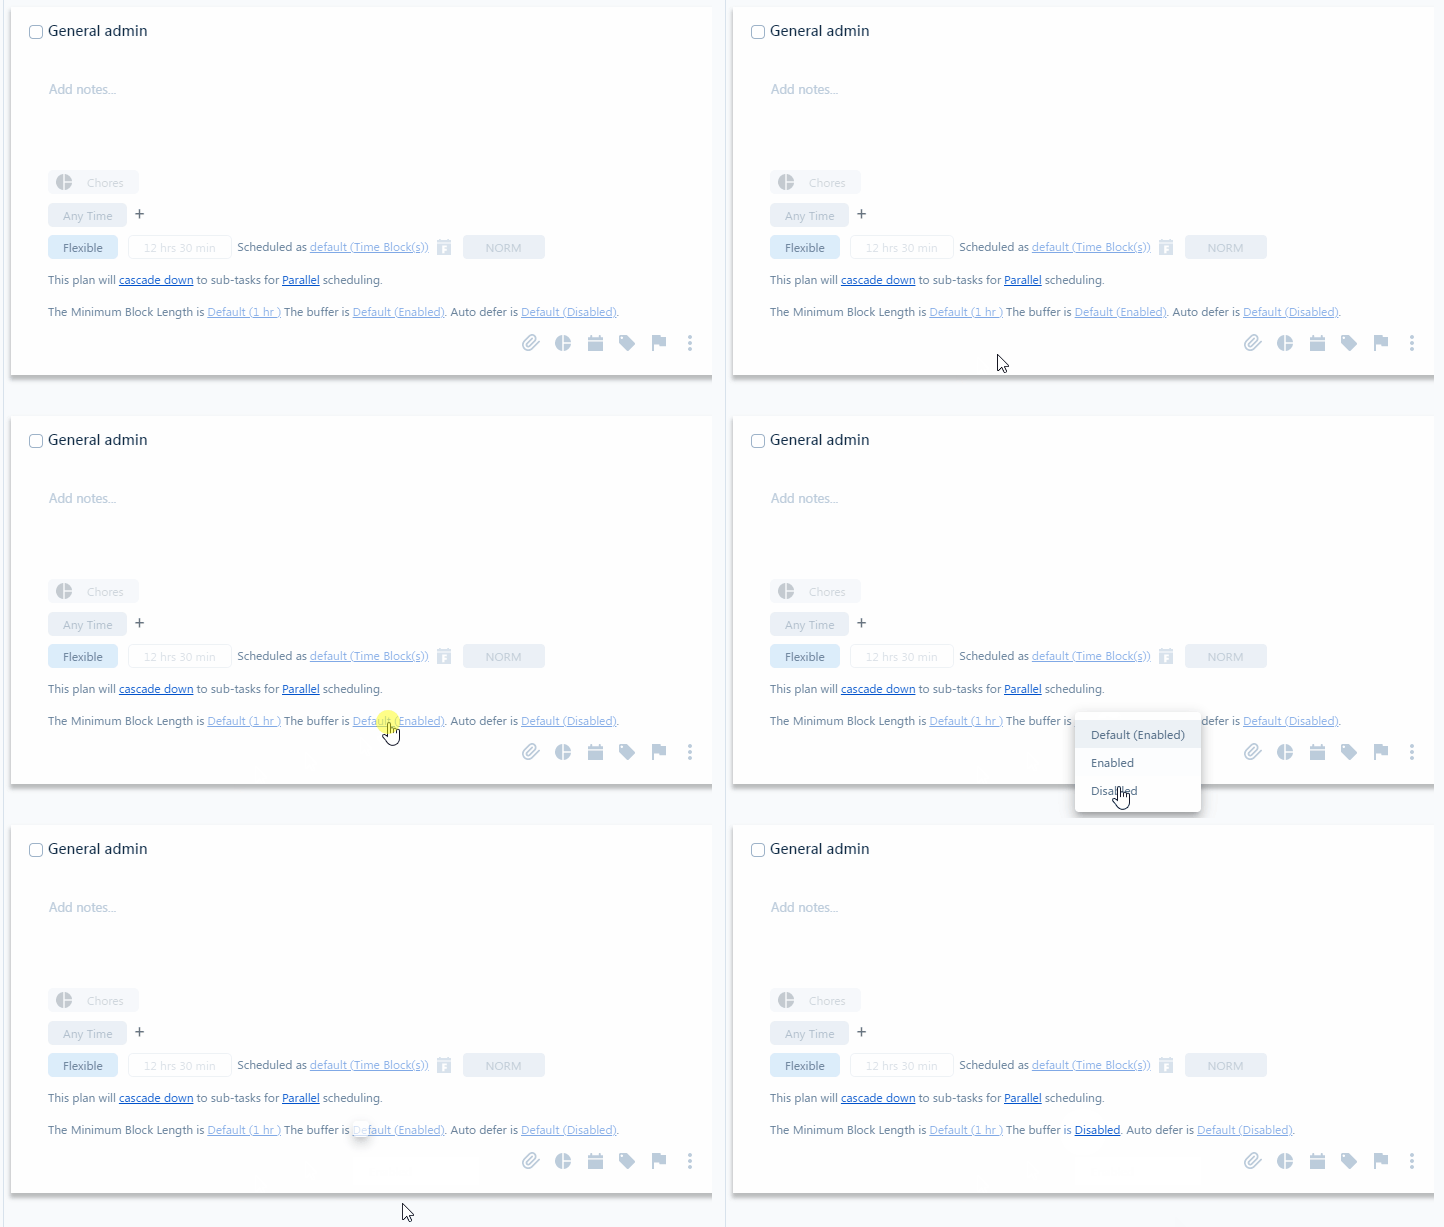
The Buffer
The buffer is another default value that is not inherited but can be adjusted in the settings. To change the buffer for a specific planned line, open the line detail and click on the hyperlinked text for this property as shown below:
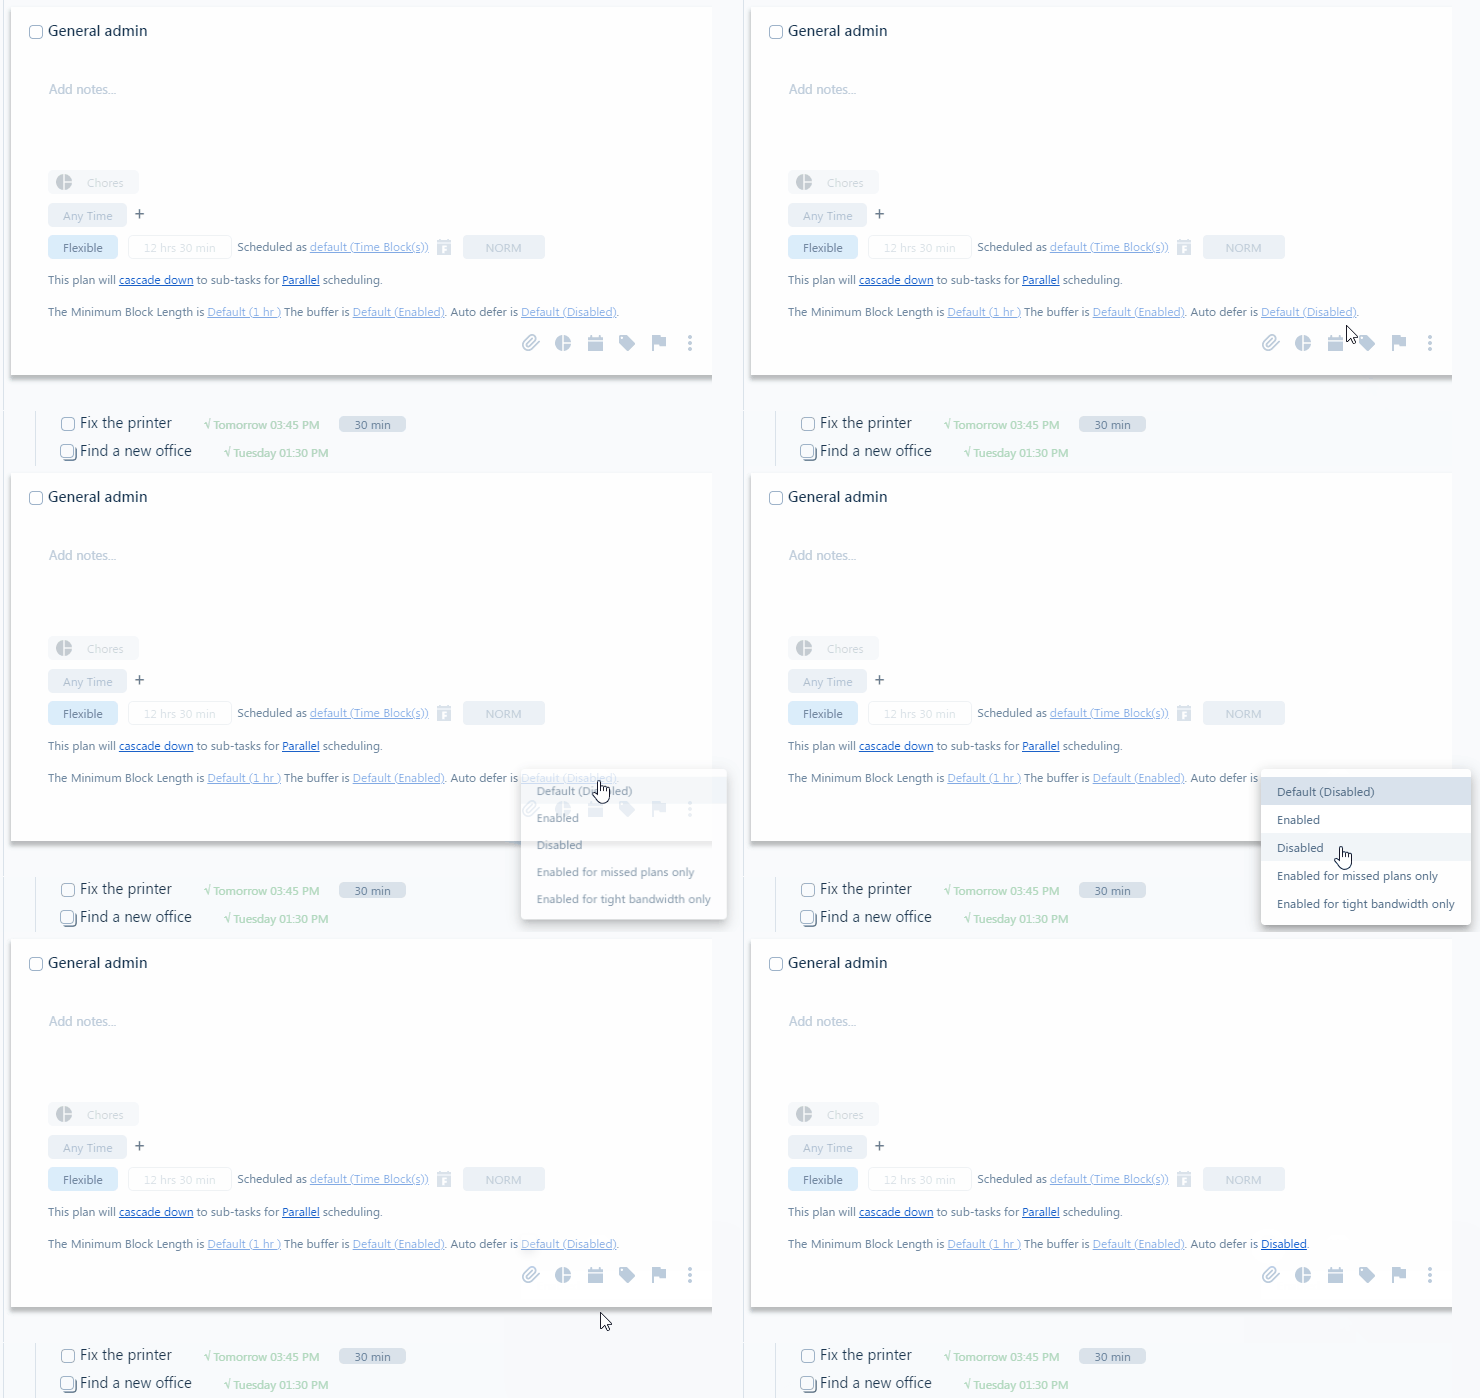
Automatic Deferring (Auto Defer)
This is another important property that uses either the default value or the inherited value from lines higher up in the Outline. To change the default value, open the line detail and click on the hyperlinked text for this property as shown below:
Bypassing or Ignoring Preferences
This advanced option will not be visible in the line detail but it does affect how your tasks get scheduled. Please refer to the Advanced Options for more details.
Due Date / Deadline
Due date or deadline is an optional property that is merely a reference and does not affect the scheduling process. Please read more about the deadline here.