The Outline is where you organize your work. It’s the place to add and save all your ideas, commitments, projects, habits, and any other type of task. The Outline is a great way to help you organize the open loops in your work and life. It’s where you need to empty your head. It can help you group thoughts and show the relationship between ideas. A well-organized outline makes it easy to tell you exactly where to put a piece of information, and exactly where to find it when you needed it.
When you first start using the Outline, you will need to build the basic skeleton as the first step. Think about the top-level category: the areas of responsibility. We all have different areas of responsibility in life and work. Examples include family, health, hobbies, work, social/friends, housework, etc. Think about your own unique top-level areas of life.
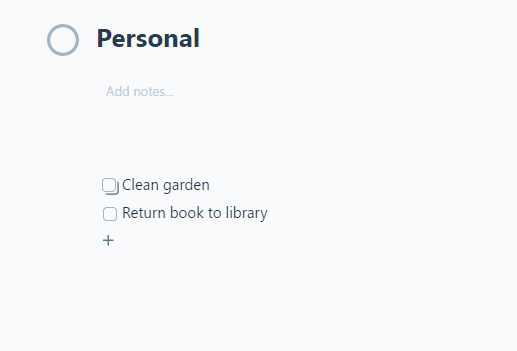
Here is an example:
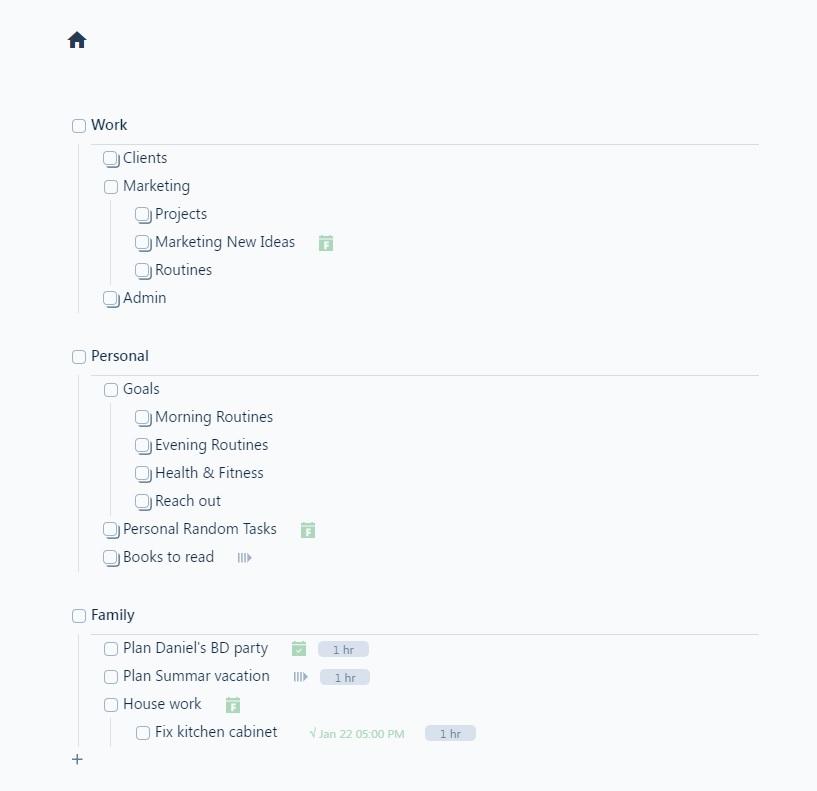
Notice that you don’t have to limit yourself to one level in the hierarchy. In the above example, we have multiple sub-areas under the ‘work’ area.
After you complete listing the major areas, start thinking about the commitments, projects, or situations that are most on your mind at this time. Add them under the right parent title. And, finally, add the actionable items (tasks.)
The following topics will explain the concepts and practical guides to using the Outline.
Areas, Projects, Tasks, Sub-tasks
While most task management apps have separate lists or structures for workspaces/areas, projects, and tasks, in SkedPal Outline, you have complete freedom to design the hierarchy. When you add a line to the Outline, it does not really matter if this is an area, a project, a task, or a sub-task. This gives you great flexibility to maintain your lists.
Any line in the Outline can potentially be an area, a project, a task, or a sub-task. The Outline does not distinguish these. What matters in the Outline is whether a line has any sublines. So, if you have a line in the Outline that has 5 sublines, you can consider this line a project and the sublines to be the project tasks.
Throughout this Knowledge Base, the terms line and task are used interchangeably to refer to a line in the Outline that can be a project, a task, a sub-task, or just a line with a title.
Sections
Sometimes, you want to make a line in the Outline bolder compared to other lines to indicate a section or area, or project. This helps with the visual clues. To turn a line into a section, simply use the keyboard shortcut CTRL (⌘ ) + B, or use the line’s menu popup and choose Set as Section.
To undo this and turn the line back to normal, use the same keyword shortcut or use the line menu option Unset Section.
It’s noteworthy that there is an additional benefit in using the sections. Once you set a line as a section, you’ll be able to use this as a criterion in Advanced Search and Filters.
Favorites
The Outline can get quite big over time. However, you may be actively working on a few projects or areas in the Outline. The favorites list is a great way to have a shortlist of the active projects or areas handy so you can quickly jump to them.
To add an Outline line to the favorites list, first, you’ll need to zoom in on it. Then, click on the star icon in the header area.
The favorite list is available on the left pane. Note that the favorite list is also appearing in a hierarchical format. So, if you add both a parent and a child to the favorites, the child will be listed as a subline of the parent in the favorites.
To remove a line from the favorite list, zoom in on it and then click on the star icon on the top right of the header area.
Orders and the Hierarchy
Design the Outline hierarchy so that it’ll be easy for you to locate a specific project or task. Do not worry about priorities when designing the Outline. There is another tool called the Board that will be used for prioritization. So, a task down the line in the Outline can be a very high priority task compared to the other lines higher up it in the Outline.
Another point to consider when designing the Outline hierarchy is the inheritance feature of the Outline. Each line in the Outline can take a number of properties. These properties normally cascade down. So, if you group tasks of similar nature, you can only set the properties at the parent level and all lines under this parent line will inherit these properties.
You Need to Schedule Only A Subset of Your Outline
The reality of the matter is that we always have more ideas than we can actually do. So, what people like David Allen suggest is to ’empty our head’ and make lists of everything we ‘wish’ we want to do. So, in theory, our lists are much greater than our ability to complete them.
Now, it’s critical not to throw everything out into your calendar. We have to be very careful in selecting our most important tasks to get into our ‘sacred’ territory – which is the calendar.
You will learn all about planning your work later.
Inbox
The Inbox is a temporary place to capture new tasks or ideas. It should be regularly emptied as opposed to the Outline where tasks or ideas reside until you decide to either complete them or delete them. Normally, adding a new task to the Outline requires concentration to decide the best place to add the task to and also decide on what scheduling properties you may want to add to this new task. So, the best practice is to add new tasks to the Inbox as a temporary place. Then, when you have sufficient time to process your Inbox, you will decide whether this is something worth adding to your Outline and whether this is something you would want to plan as well.
Of course, there are situations when you want to directly add your new tasks to the Outline. For example, you are in the middle of your work and suddenly a new time demand pops up: You need to call someone today. So, if you have a specific line in your Outline for this (e.g. Phone Calls, Admin Tasks, or Follow-Ups), you might as well use Quick Add to directly place this task in the Outline and plan it for today.
When you use Quick Add, your tasks are added to the Inbox by default. But, you can change the parent line if you wish. In the above example, you can change the parent line from Inbox to ‘Phone Calls’.
When you add tasks to the Inbox, you also need to allocate time to process your Inbox. Setting a recurring task to process your Inbox is a good practice.
Once you decide to move a task from Inbox to the Outline, there are several methods to move single or multiple tasks from Inbox to the Outline.
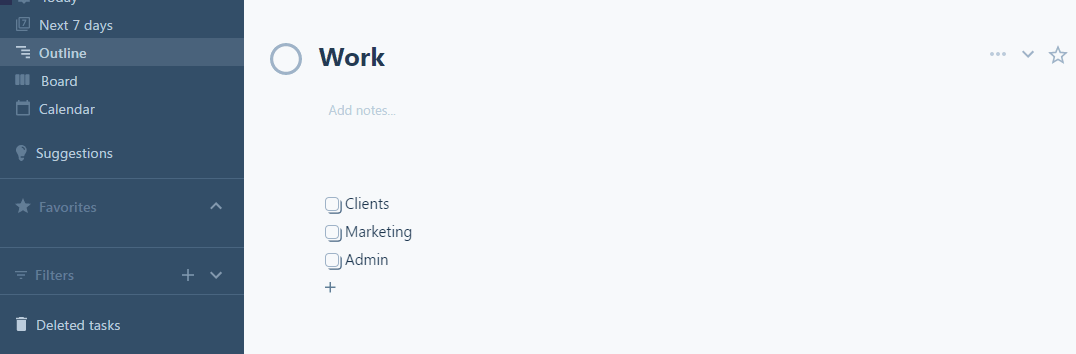
The Anatomy of the Outline
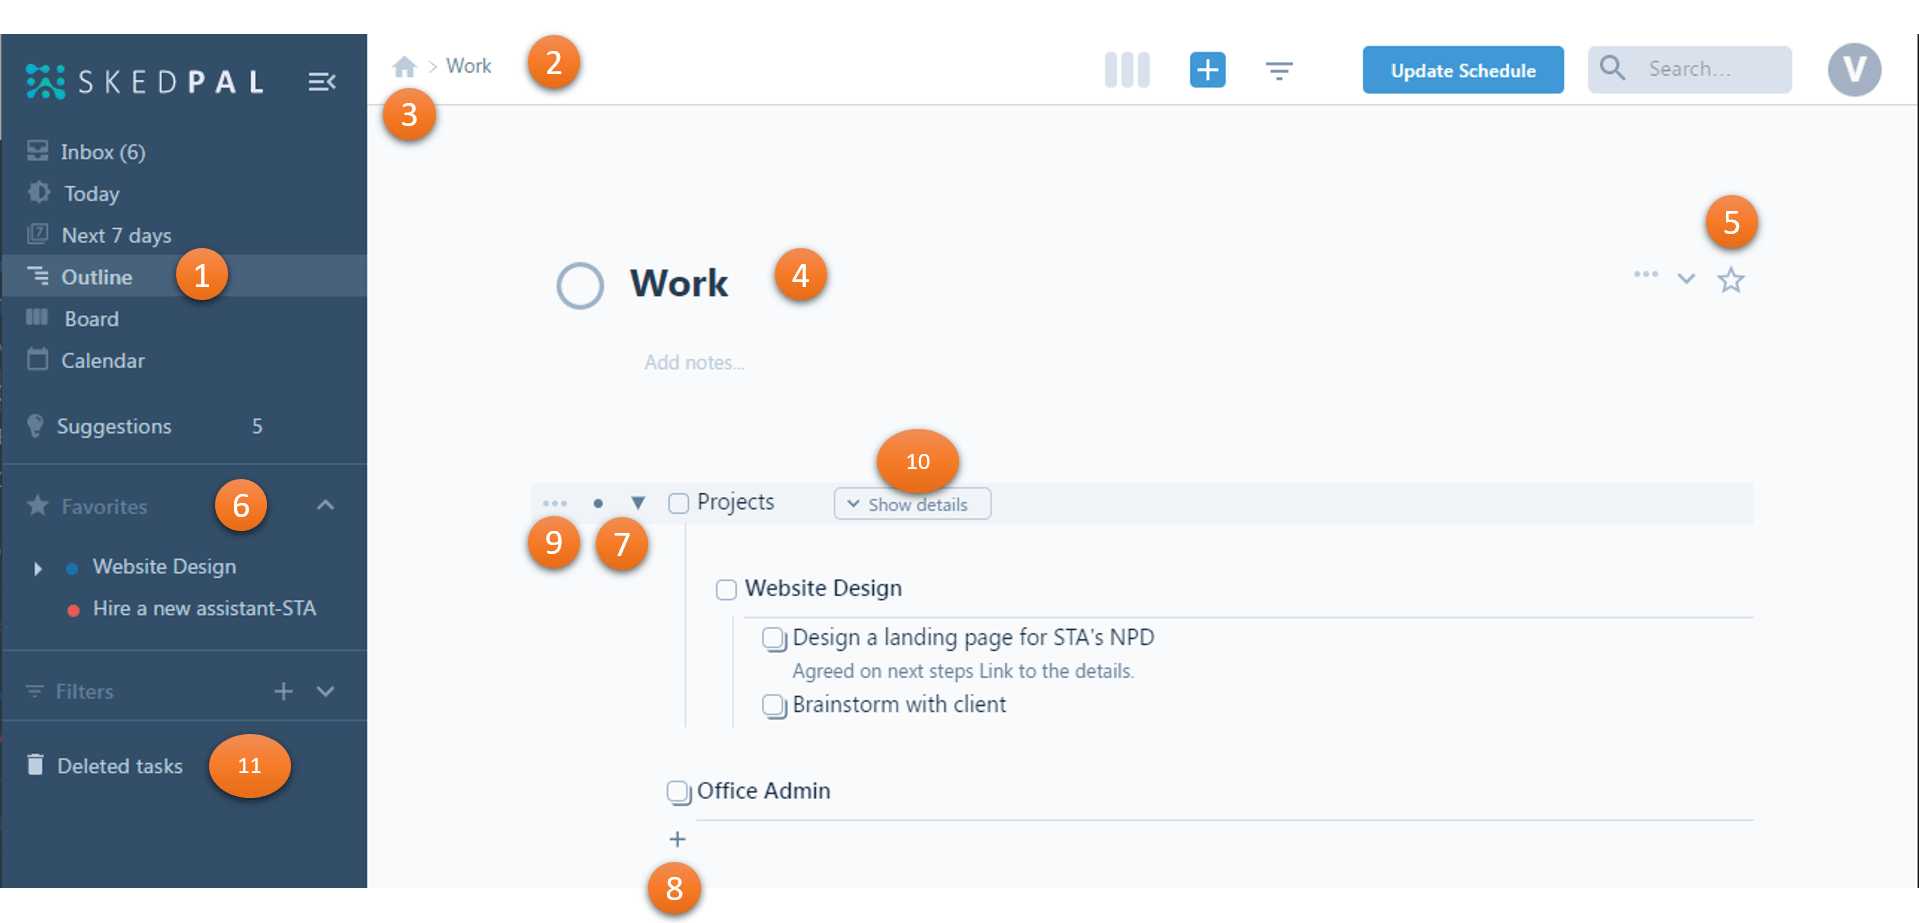
- The left menu option ‘Outline’ refers to the hierarchy of your tasks. When you click on it, it loads the last zoomed-in task. See number 3 below.
- Breadcrumb is an important element that has two roles:
- Shows you where you are in the hierarchy. The root level of the Outline is called ‘Home’.
- Allows you to go back up in the hierarchy by clicking on any of the items in the breadcrumb.
- The parent line is one level higher up in the hierarchy. If you’re in the top level of the Outline, the parent is ‘Home’. Otherwise, the parent is always shown in the breadcrumb as one level higher than the current zoomed-in level.
- Zoomed-In Header – Except when you are viewing the home page, you are always zoomed in on a title. A title can be either an area, a project, or a task. In other words, it really does not matter what you call it. In SkedPal 3.0, if you have a title with many sub-titles and each sub-title has many other sub-titles, you’re probably looking at a broad area of your work or life. But, if you have only a few sub-titles under the zoomed-in header, that’s more like a task with a few sub-tasks.
- Star Icon – You can add a zoomed-in title to your favorite list by clicking on this star icon. Note that this icon is only available when you zoom in on the title.
- Favorites – This is the list of your favorite titles. A better name would have been the list of your current titles (projects) that you want to frequently access.
- Circle and Triangle Icons – When you hover the mouse over a line, you will see some icons that will help you to get the best view:
- The triangle will help you to expand and collapse a parent title. It only appears if the title has some sub-titles.
- The circle icon allows you to zoom in on a title.
- Plus Icon – This will add a new title right below the last title on the list. To add a title in between existing lines, just click on the line and press the ENTER key.
- Line Menu – This will open the menu of options for the line.
- Line Detail Opener – This will open the line detail.
- Deleted Tasks – This is a list of deleted tasks.
Please also see the Plan Icon that can appear on a line in the Outline.
Adding Tasks
Adding tasks to the Outline is easy. Click on the + button at the end of the list to add a new line.
Alternatively, click on any other task and then press the ENTER key to add a line below it. Note that if the mouse cursor is at the beginning of a line, pressing the ENTER key adds a new line above it.
You may also use the Quick Add to add tasks to the Outline.
Tasks can also get added to the Outline by sending email through a Zapier integration or Asana Integration.
You can also cut text from other sources such as a spreadsheet or text file and paste it into your Outline.
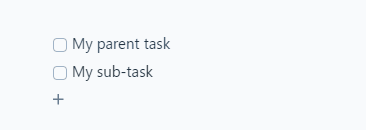
Adding Sub-tasks (Sublines)
Each line in the Outline can become a parent line if you add new lines under it. So, if a line in the Outline is a project and you want to add tasks under it, you can. And if one of the tasks requires sub-tasks, you can add them too.
To make a line a sub-line (or sub-task) of the line above it, simply click on the line and then press the tab key.
If there is a whole group of lines in the Outline that you would like to move under a different parent line, use the move methods.
Deleting a Line
To delete a line, use the backspace key to delete the title. Once the last character of the title is deleted, the line will also be deleted.
You can also click the task and then use the following keyboard shortcut:
CTRL (⌘ ) + SHIFT + Backspace
Expanding and Collapsing a Parent Line
To expand or collapse a parent line, click on the parent line and use these keyboard shortcuts:
Outline Expand Parent: Windows: Alt + ↓ macOS: ⌥ + ↓
Outline Collapse Parent: Windows: Alt + ↑ macOS: ⌥ + ↑
Alternatively, you can use the triangle next to the parent line title:
Zoom In
Zooming in is a very useful feature in the Outline. It helps you to have a focused view on a specific section or group of lines in the Outline and hide all the noise around it. To zoom in on a specific line, click on the kind and then use these keyboard shortcuts:
Outline Zoom in: Windows: Alt + → macOS: ⌥ + ⌃ + →
Outline Zoom out: Windows: Alt + ← macOS: ⌥ + ⌃ + ←
Alternatively, you can click on the little circle to the left of the line title:

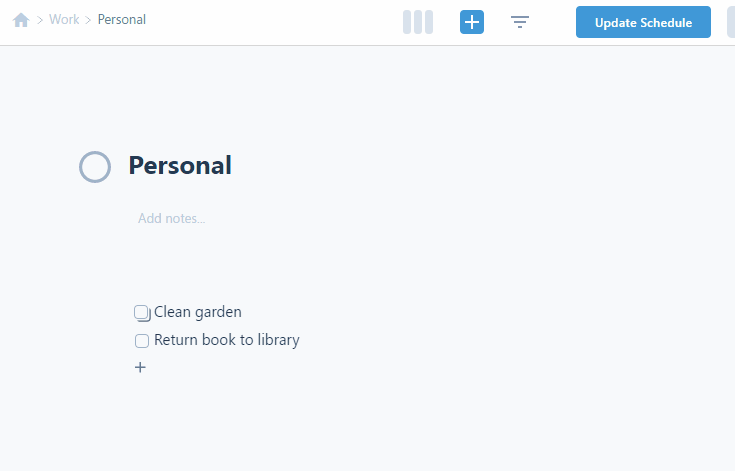
The Breadcrumb and Zoom Out
To zoom out or go to other parts of the Outline, use the breadcrumb at the top left of the screen. The breadcrumb always shows you the path from the Home to the current zoomed-in line. Clicking on any segment of the breadcrumb will take you to that line.
Jumping (Searching)
Your Outline can grow quite big over time. There are two ways to find a specific part of the Outline:
- To browse the Outline and find what you’re looking for.
- To jump to a specific line in the Outline using the Jump feature.
To jump to a specific line, use the keyboard shortcut:
CTRL (⌘ ) + SHIFT + K
This will open a popup that enables you to search for a specific line.
Using the Line (Task) Link
Each line in the Outline has a unique URL (link.) To copy the line link, use the line menu option Copy link. Then, you can paste this link inside the note of relevant line(s) in other parts of the Outline to quickly jump to the target line. You may also use this link to paste it into other apps or documents.
Using the Browser Back and Forward Buttons
The browser back and forward buttons work well in the Outline. Sometimes, you zoom in or zoom out and you want to quickly go back to where you were. The back button is a quick shortcut to take you back.
View Options
You can customize the Outline using the following view toggles:
- To show only planned, only un-planned tasks, or all – This is a great view option when you want your Outline to be filtered. For example, if you have a weekly review process and you want to review all tasks that have not been planned yet, you can use this toggle.
- To show or hide completed tasks – When you complete a task in the Outline, you will have the option to immediately remove it from your list, keep showing it for at least a day then remove it from your list, or show it for 7 days. Note that completed tasks older than 7 days will not load into the web app; however, they’re available on the server-side for retrieval upon request.
- Highlight the lines in the Outline with either the zone color, or the priority color. This will be very helpful when you want to browse your Outline and have some visual clues to help you find what you’re looking for.
Marking A Task as Complete
To mark a task as complete, simply click on the checkbox to the left of the task title. Depending on your View Options, your completed task may disappear from your list. Note that completed tasks older than 7 days will not load into the web app; however, they’re available on the server-side for retrieval upon request.
To undo your action, you can click on the checkbox again to make the task active again. If your task has a plan, completing it removes the plan. And if you undo completing your task, the plan re-activates.
Archiving Old Completed Tasks
There are three categories of completed tasks in SkedPal:
- Tasks completed in the past 24 hours – If you use the View Options to hide completed tasks, as soon as you mark a task as complete, it will disappear from the Outline.
- Tasks completed between 24 hours and 7 days – If you use the View Options to hide old completed tasks, these tasks will not show in the Outline.
- Tasks completed more than 7 days ago – These tasks will be archived in the database and do not load into the app.
Retrieving Archived Tasks
If you completed a line in the Outline more than 7 days ago, it automatically gets archived. To retrieve an archived task, you should zoom in to the parent line – where the archived task used to exist under. Then, use the parent line menu and select the option ‘Retrieve archived sub-tasks’. Once you click this menu option, a popup window will ask for a date. The purpose of this date is to avoid retrieving very old archived tasks and allow you to only retrieve tasks completed after a specific date. If you’re not sure when your task was completed, use an old date after which you’re certain this task was completed.
Once you retrieve sub-tasks, all completed tasks after the specified date and parent will get restored. The restored completed tasks will only be visible for the current session. If you intend to keep a completed task visible, make it incomplete again; otherwise, it will be auto-archived in the next session.
Completing a Parent Task
When you complete a parent line in the Outline, all lines under the parent will be shown dimmed. This is to indicate that they will not be considered active tasks and will not be scheduled. Even though you did not explicitly complete sublines (sub-tasks), completing their parent will also assume all sublines (sub-tasks) are complete.
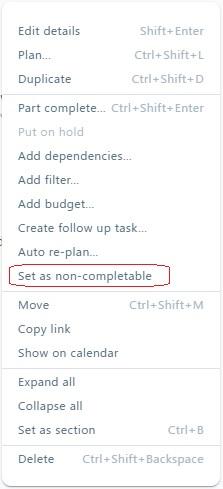
Securing Parent Tasks – Uncompletable Parent Tasks
You can set a task (parent/section) not be completable (non-completable). This will help prevent unintentional completing of parent tasks. To set a task as uncompletable, use the task menu to find the option.
Partially Completing a Task
To fully complete a task, simply click on the checkbox.
When you have partially completed a task, use CTRL (⌘ ) + Click on the same checkbox to see more options for partially completing a task.