Harnessing Precision with Filters
Ever found yourself yearning to zero in on a specific project or zone within your calendar? Filters offer a solution, allowing you to spotlight relevant tasks while gently dimming out the rest. This functionality proves invaluable when you want a focused view, such as tracking tasks tied to a particular project or assessing the workload in a specific zone on a given day.
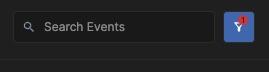
To incorporate a filter into your calendar view, locate the filter icon situated at the top right of the right pane in the calendar. Upon clicking this icon, a menu will unfold, presenting a list of criteria options – explained in detail below.
Once you’ve chosen a filter from the menu, it’s essential to scroll down to the bottom and select ‘Apply’ to activate it on the calendar. The active filter is denoted by a red dot on the filter icon, serving as a visual cue that a filter is currently in effect.
The versatile filter criteria encompass:
- Parent Line Selection: Choose a parent line to include every task scheduled under it. This is particularly advantageous if your outline is organized semantically, enabling you to filter your calendar for specific categories like ‘personal’ tasks or tasks associated with a designated project or section.
- Type-Based Filtering: Filter based on the type of items scheduled, including Time Blocks, Bundled Tasks, Exclusive Bundles, Fixed-time Tasks, and Synced Events from external calendars. This becomes handy when you want to emphasize certain types of events, such as highlighting all fixed-time events or time blocks.
- Time Map-Based Filtering: Opt for filtering based on Time Maps, an excellent tool to highlight or dim specific types of tasks. For instance, you can emphasize work-related tasks while dimming personal tasks.
- Zone-Based Filtering: Highlight one or more zones in the calendar. If you actively use Zones, this filter provides a quick overview of how much of a particular zone is scheduled for each day or week.
- Tag-Based Filtering: A bonus filtering option when other criteria fall short. Tag specific tasks and use this filter to isolate them. For example, if you utilize GTD contexts, you can assign a tag for each context and filter based on these tags, offering an extra layer of customization for your task management.
Synergizing Filter Criteria
The beauty of utilizing filters lies in their flexibility to combine multiple criteria, offering a nuanced approach to shaping your calendar view. Here’s how the different criteria interplay:
Within a single filter criterion type (e.g., Time Maps), you have the liberty to select multiple Time Maps. This implies that tasks matching ANY of these Time Maps will be highlighted in the calendar.
Building on this, you can introduce additional criteria to refine your focus. For instance, you might opt to select one or more Zones. It’s crucial to grasp that each additional criterion introduces an ‘AND’ logic. In our example, selecting two zones means that for a task to be highlighted, it must match ANY of the Time Maps AND ANY of the Zones.
This layered approach empowers you to tailor your calendar view with precision, ensuring that the tasks highlighted meet the specific combination of criteria you’ve set. Whether it’s emphasizing tasks associated with particular Time Maps, Zones, or a blend of both, the combined filter criteria offer a dynamic tool for a nuanced and detailed calendar presentation.
Streamlining Navigation of Filtered Tasks
Once you’ve applied a filter criterion, the corresponding tasks elegantly unfold on both the right pane and the calendar grid. This dual presentation offers you the flexibility to navigate your schedule seamlessly.
You can choose to traverse the calendar day by day or week by week, exploring the filtered tasks visually. Alternatively, you can efficiently peruse the right pane, where each task appears as a card. Clicking on any of these cards in the right pane effortlessly guides the calendar to the relevant date, instantly revealing the associated task. This synchronized navigation ensures a smooth and intuitive experience as you focus on and explore the tasks that align with your specific filter criteria.
Clearing Filter Criteria
When you wish to restore your original view and eliminate any applied criteria, the process is straightforward. Simply click the filter icon positioned at the top right. Once the menu appears, click the ‘reset’ button to promptly remove all existing filter criteria.
A helpful indicator is the red dot adjacent to the filter icon, signaling that a filter is currently active. This visual cue ensures clarity, making it easy to identify when there’s an applied filter in place. By utilizing the reset option, you can swiftly revert to an unfiltered perspective, streamlining your experience with the calendar.
Preserving Filters within Views
For a seamless and personalized experience, you have the option to save a filter as part of your ‘View.’ For more comprehensive details, refer to the ‘Views’ section.
Integrating Outline and Calendar Views
Toggling between the Outline and Calendar views can be a frequent task. Fortunately, this feature offers a seamless solution. If you find yourself wanting to explore different sections of your Outline and simultaneously view the scheduled tasks, the Outline criterion can be your go-to tool. Simply open the Outline criterion, navigate through your Outline, and press the spacebar on each line. This action instantly applies a filter to the calendar, spotlighting the tasks related to the selected Outline line.
To access the Outline criteria, you have multiple options. Utilize the keyboard shortcut Win: Ctrl+Alt+O (Mac: ⌘ ⌥ O), or click the icon next to the Parent criterion in the Filter menu. This integration simplifies the process of reviewing different parts of your Outline while seamlessly visualizing their corresponding scheduled tasks on the calendar.
Personalizing Your Calendar Views
Customizing your calendar to align with your unique needs has never been more accessible. You have the flexibility to tailor it to display a single day, an entire week, or any other personalized number of days. Additionally, you can toggle between dark mode and light mode, show or hide Time Map sidebars, and choose whether to display synced calendar events. The customization options extend further to showcasing task colors, zone colors, or heat-map colors. Moreover, you can apply filters based on specific criteria, refining your view to focus on the tasks and events that matter most. The ability to show or hide the left pane adds another layer of personalization.
The exciting part is that these customizations can be saved within a view, and you have the freedom to create multiple views with distinct settings. Each view caters to specific needs and circumstances, offering a tailored experience. This feature empowers you to effortlessly switch between views, ensuring that your calendar adapts seamlessly to your changing requirements.
By default, when you haven’t created any views yet, your initial view is titled ‘My View.’ If you wish to rename a view, simply hover your mouse over the view name, and three dots will appear. Click on these dots to open a menu, and you’ll find the option to rename your view.
Once you’ve renamed your view, feel free to customize it according to your preferences, such as displaying a single day. After making your adjustments, save the view either by using the keyboard shortcut ( Win: Ctrl + Enter Mac: Cmd + Enter ) or by clicking the three dots next to the view name and selecting “Save” from the menu.
To introduce a new view, click the “+” button located next to the existing view names.
Keep an eye out for a red dot appearing next to the view name after making changes. This dot signals that modifications have been made. Remember, if you switch to another view without saving changes, those alterations will be disregarded. If you’re experimenting with temporary adjustments, either switch to another view and return or use the ‘Revert’ option in the view menu to return to the saved configuration.
