See what users who have already migrated have to say:

SkedPal 3 is a lot more powerful and flexible than SkedPal 2, and the interface is much easier to manage and nicer to look at.

I liked SP2. But there are lots of improvements both in power and usability in version 3. One of the main improvements is that it takes a lot less time to keep my data up to date.

The prioritization feature might be exactly what you were missing. I liked SkedPal 2 a lot but it still didn't fix the problem I had for which I didn't even know a solution existed.
There’s an exciting new version of SkedPal waiting for you. Massive improvements have been made to make you 10x more productive.
The migration process, however, is not going to be a walk in the park, unfortunately. Just like all major improvements, there is some work involved. The user interface of SkedPal 3 is totally changed and you will need to learn the new UI. Also, the way you plan your tasks and prioritize them is changed. We have put together a roadmap to take you from a neophyte to a ninja!
Here is our pledge to you. Your investment in learning version 3 and migrating your data will be well worth it!.
Disconnect your Calendars from SkedPal 2. Since you’ll be connecting your calendar(s) (Google, Office 365, iCloud) to SkedPal 3, keeping the sync with both 2 and 3 will create duplicate records and issues in the sync process. So, head over to SkedPal 2 settings and disconnect your calendars first.
If you’re using Asana Integration, please disconnect your Asana account as well.
The first step is to SIGN UP at www.skedpal.com! You will need a desktop browser. Please note that your SkedPal 2 credentials (email and password) are not migrated to SkedPal 3. So, please sign up like a new user. Use the same email as your account in version 2 to sign up. This will help you to migrate your data automatically as we will show.
If you had already requested access to the beta version of SkedPal 3 in the past, then you should already have an account. Please use the ‘Sign in’ option instead of ‘Sign up’.
Please note that that your subscription will also migrate once you sign up using the same email address. We’re here to support you in case you have any questions and issues.
Complete the tutorial that shows right after you sign up. There are 8 steps in the online tutorial with short videos. This is your first introduction to the new interface and features. Please take time to watch the videos and do the exercises. This should take about 30 minutes.
Join our user community forum! This is where everyone asks questions, shares ideas, or learns about new features.
Once you learn the basic navigation of the app, it’s time to migrate your data from version 2. This process will migrate all your active tasks and projects along with the task description, task duration, Time Maps, and tags. This process does NOT include plans. So, your calendar will not include any scheduled tasks. You will have to learn about the improved planning features in SkedPal 3 before you plan your tasks again.
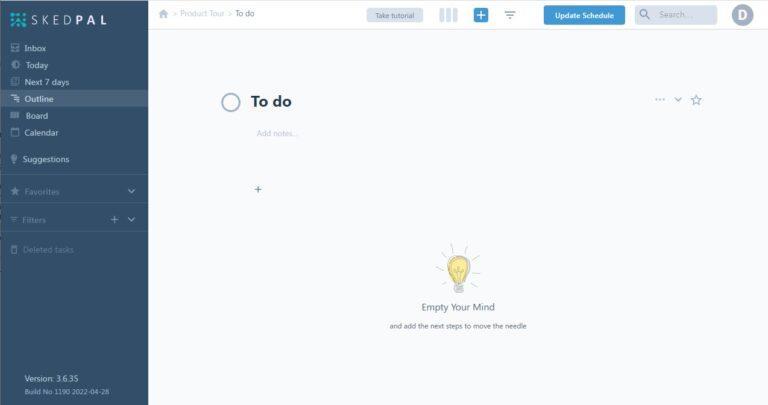
The below screen is most likely what you will see right after you finish the tutorials in step 2.
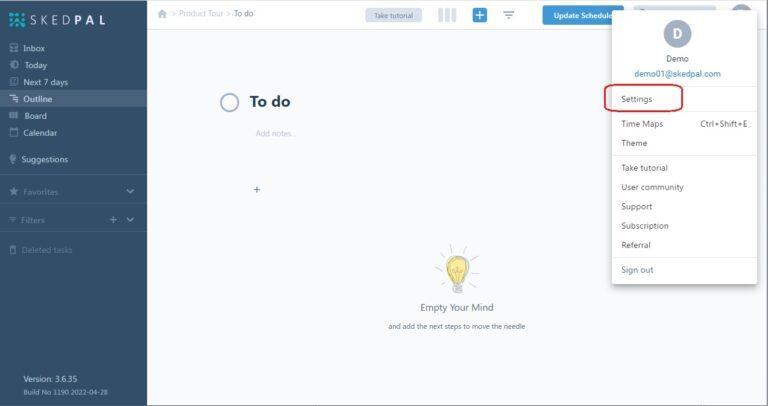
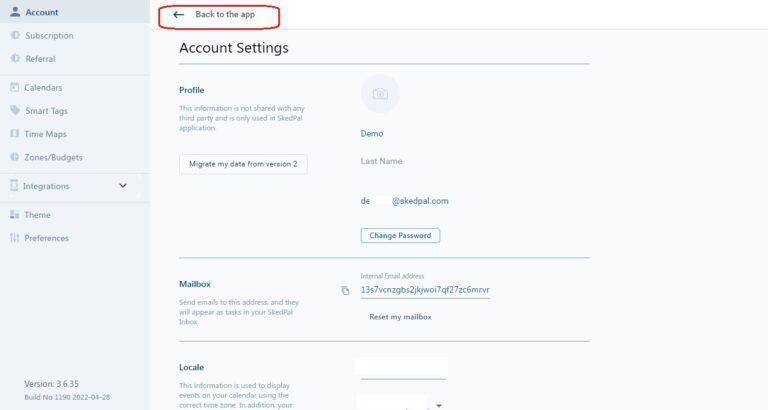
Open the app menu and select Settings:
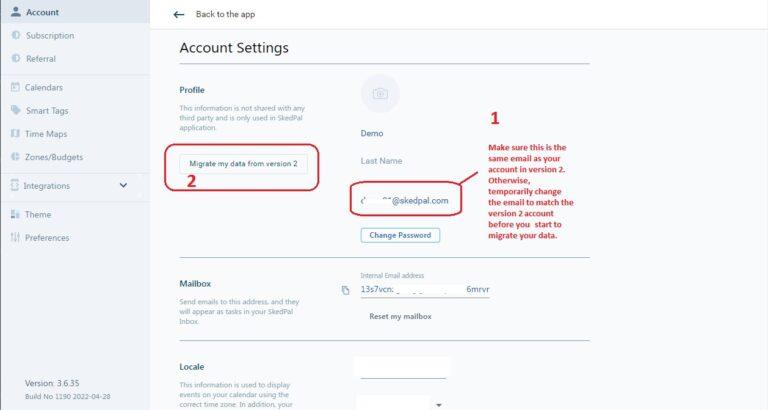
Make sure that your email shown here is the same as your email in version 2.
In case they are different, you can temporarily change your email here in version 3 to match version 2.
After you verified that both emails match, click on the ‘Migrate my data..’ button.
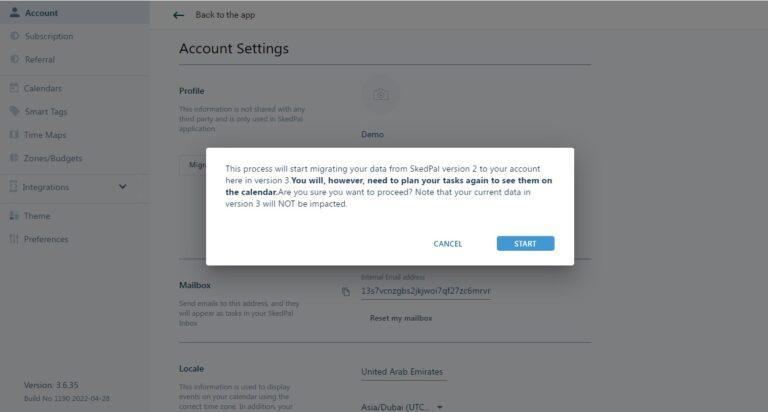
A popup opens and explains the process.
Now, we want to go back to the list of tasks. Click on ‘Back to the app’.
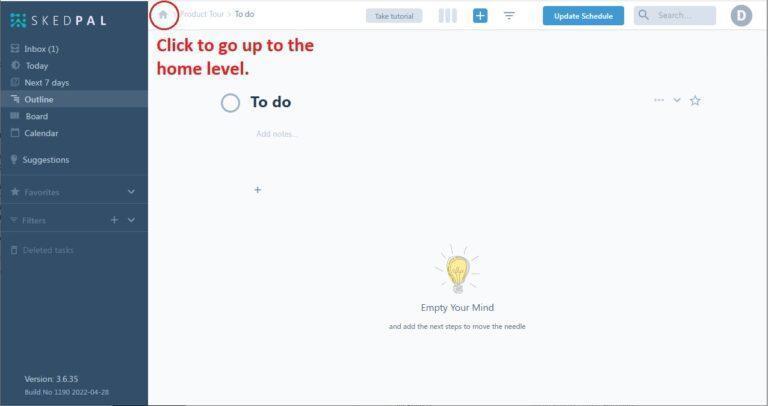
This is a very important part to understand. SkedPal 3 supports zooming in and out. The top left of the screen always shows where you are. To go to the top of the Outline, click the home icon.
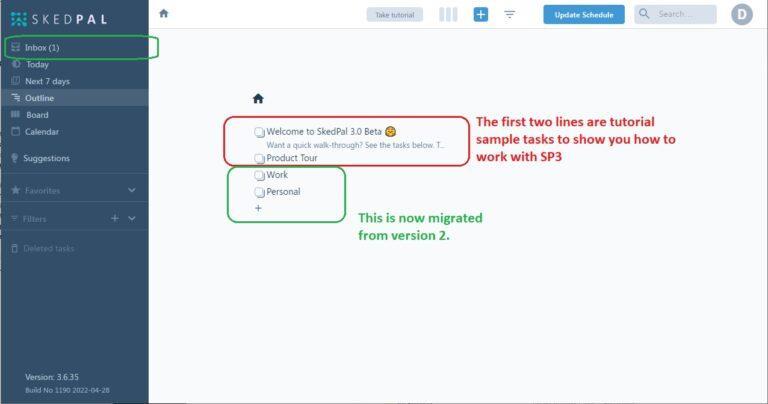
You should now be seeing the areas in version 2. It’s probably worth skimming the Knowledge Base Outline section to learn a bit more about how version 3 areas, projects, and tasks are organized.
Let’s take a look at our data in version 2 and compare it with how it looks in version 3.
And, here is how it looks in version 3:
Dozens of new features, improvements, and fixes await you in this version. The best place to discover what’s new is in the Getting Started Guide available in the Knowledge Base.
| Cookie | Duration | Description |
|---|---|---|
| cookielawinfo-checkbox-analytics | 11 months | This cookie is set by GDPR Cookie Consent plugin. The cookie is used to store the user consent for the cookies in the category "Analytics". |
| cookielawinfo-checkbox-functional | 11 months | The cookie is set by GDPR cookie consent to record the user consent for the cookies in the category "Functional". |
| cookielawinfo-checkbox-necessary | 11 months | This cookie is set by GDPR Cookie Consent plugin. The cookies is used to store the user consent for the cookies in the category "Necessary". |
| cookielawinfo-checkbox-others | 11 months | This cookie is set by GDPR Cookie Consent plugin. The cookie is used to store the user consent for the cookies in the category "Other. |
| cookielawinfo-checkbox-performance | 11 months | This cookie is set by GDPR Cookie Consent plugin. The cookie is used to store the user consent for the cookies in the category "Performance". |
| viewed_cookie_policy | 11 months | The cookie is set by the GDPR Cookie Consent plugin and is used to store whether or not user has consented to the use of cookies. It does not store any personal data. |
